
In chapter one for continuous backup for Data protection manager 2012 Exchange 2013, we had a brief introduction about the service and how it could help Exchange Users. In this segment, we will have a discussion on how to continue working with this service once DPM is installed.
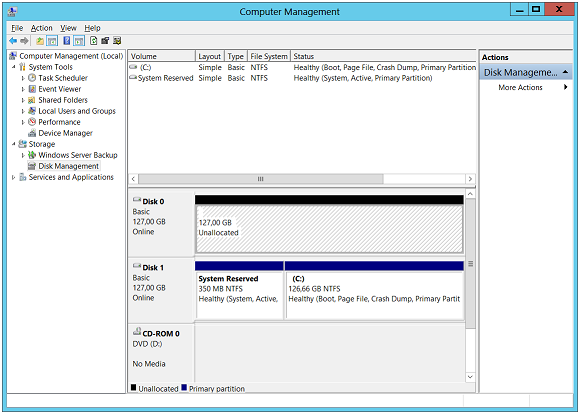
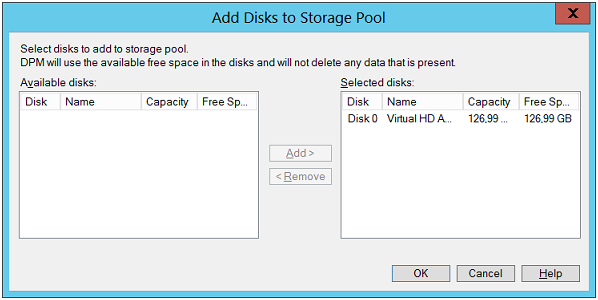
Once Database Protection Manager 2012 is successfully installed, the next step is to configure storage pool. For this, a dedicated disk will be required and to create it, a volume on the disk has to be freed up. In the figure below, Disk0 is a shown as an ideal choice for configuring storage pool as it is completely free.
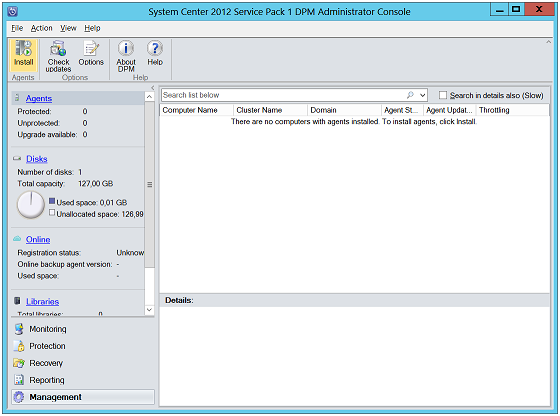
In the DPM Administrator Console, click on "Install" button under "Agents" tab. A wizard named Protection Agent Installation Wizard will pop up screen that will provide guidelines to create protection agent for DPM.
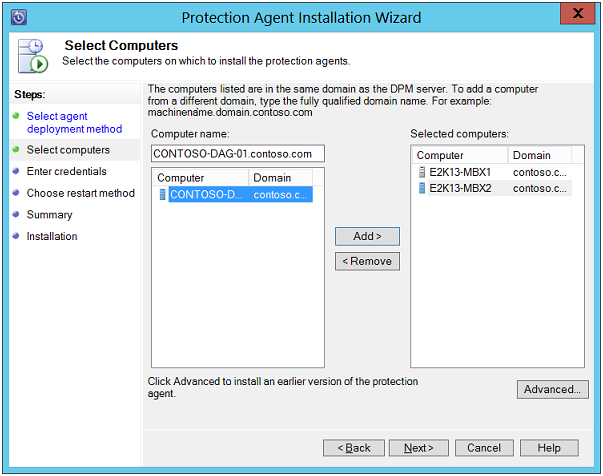
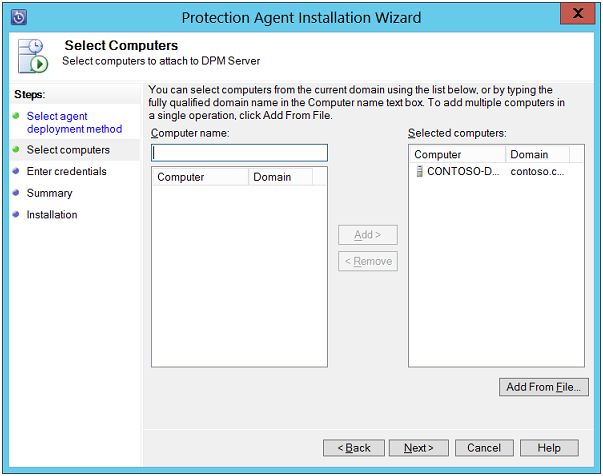
Select Computers: On this page, select one or multiple computers from the list named "Computer Name" and click on "Add" button. Hit the Next button to continue.
Important to Note: For protection of a DAG node, the recommendation is to install the agent on that node.
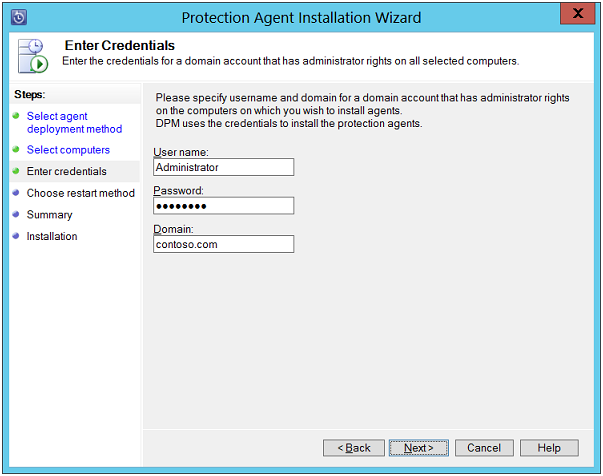
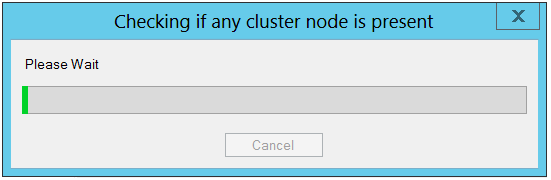
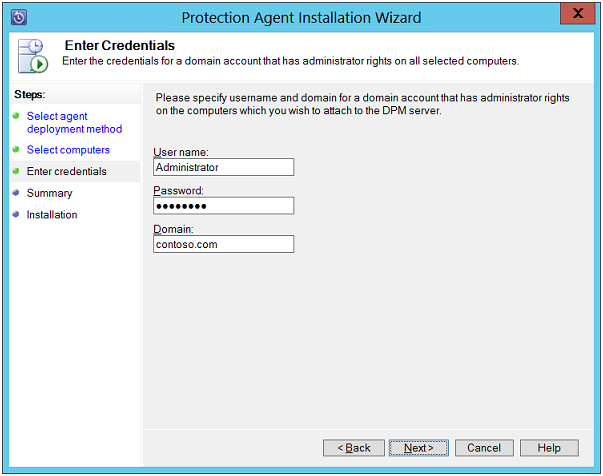
Enter Credentials: On this page, provide details about the domain account that is a member of local administrators group on Servers that are being selected. Enter the username, password, and Domain name and click on Next button to continue. Now, the Database Protection Manager node will make attempts to detect clusters.
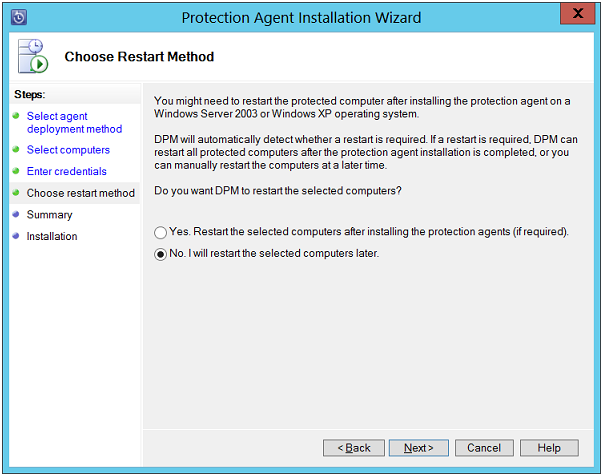
Chose Restart Method: On this page define when do you want to restart the computer after installation off protection agent. Make sure that computer is restarted before data protection process gets started. Click Next.
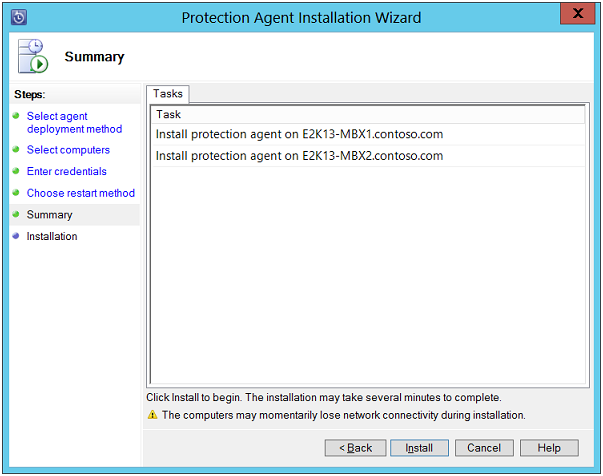
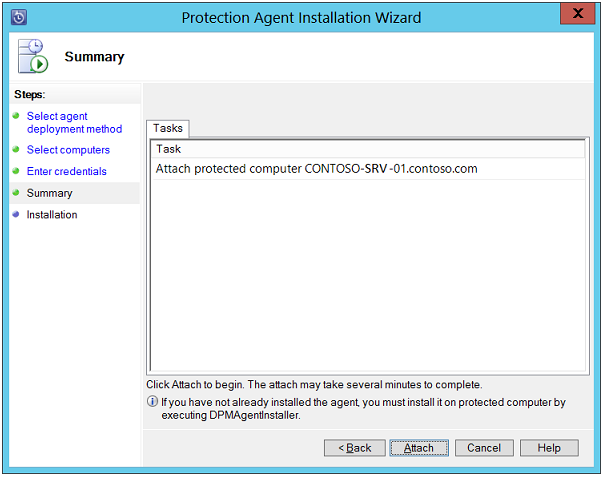
Summary: On this page, click on "Install" button to start up installation process.
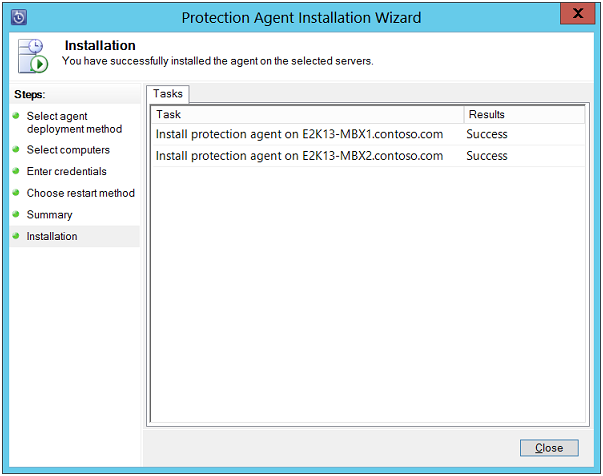
Installation: On this page, the status of installation process will appear on the Tasks tab. Click Close button to exit the window when Success status is displayed.
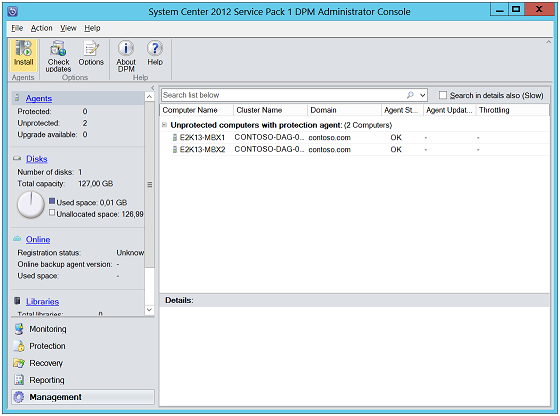
The machines on which agents are installed will be available under "Unprotected Computers with Protection Agent" section.
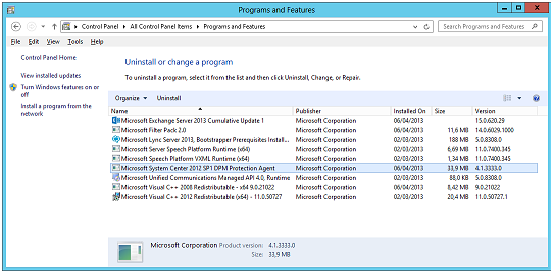
When the agents are properly installed, they will be available under "Programs and Features" section.
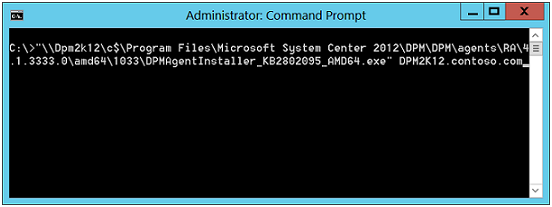
There are times when protection agent for DPM has to be installed manually. For example: In situations when computer to which protection agent has to be assigned is in a workgroup or underlies in a domain that do not have two way trust relationship. When an agent is installed, it has to be manually attached to the computer that has DPM administrator console.
Step1) Open Command Prompt and enter following command:

Step2) In the DPM Administrator Console, Click on "Management" in the navigation bar. Now, in the "Agents" tab click on "Install" button.
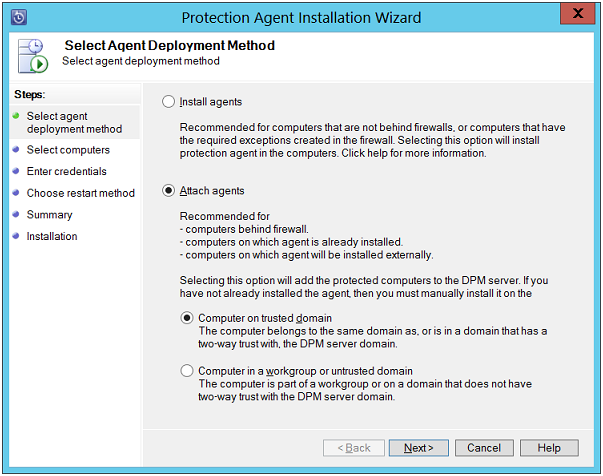
Select Agent Deployment Method: On this page, click on "Attach Agents" and "Computer on Trusted Domain" option. Click on Next button to continue.
Select Computers: Here select the computers on which agents are to be installed and click on "Add" button.
Enter Credentials: Enter username and password and name of domain that is the member of local Administrators group on selected Server.
Summary: On this page, click on "Install" button to start the agents installation process on computer.

Installation: On this page the position of PDM protection agent installation will be shown. When it says "Success" for all computers, close the window.
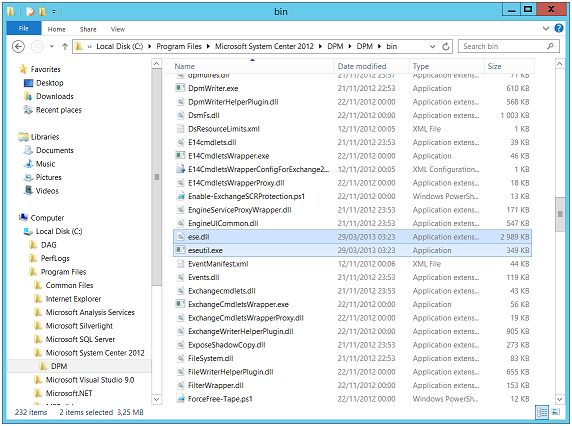
Copy ESEutil and ESE files from system where Exchange Server is installed to DPM Server. Meanwhile make sure that ESE and ESEutil files of Exchange Server should be of same edition as that of versions that installed on DPM Server.
For creating protection group, click on "Protection" task area. In the actions pane, click on "Create Protection Group".
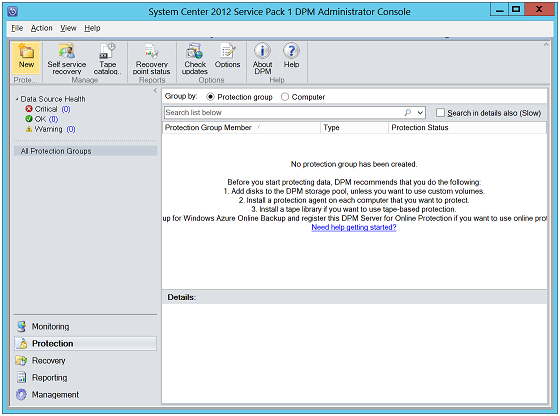
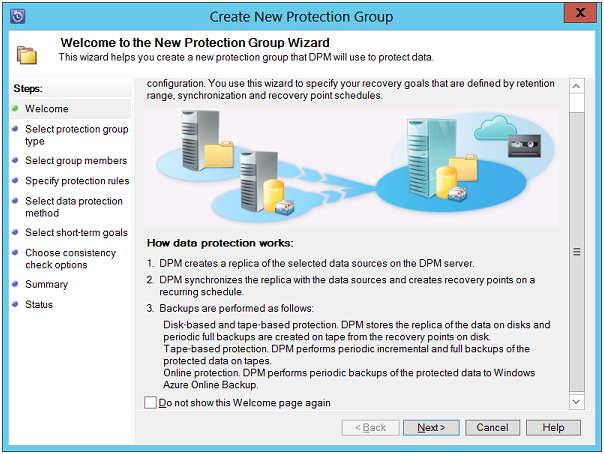
A new wizard will get opened on screen that will help you to create protection group step by step. Click on Next button.
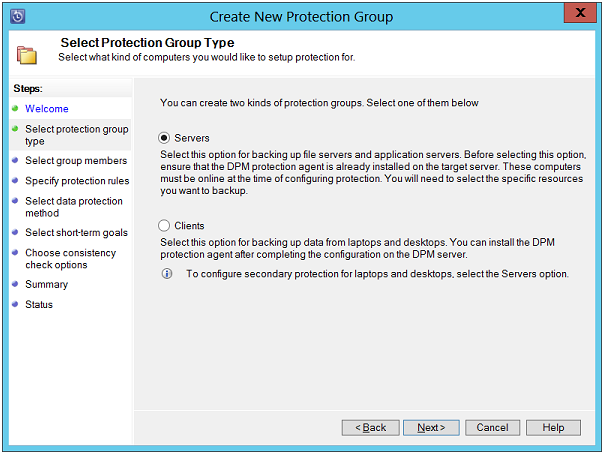
Select Protection Group Type: In this page, enable the radio button for "Servers"
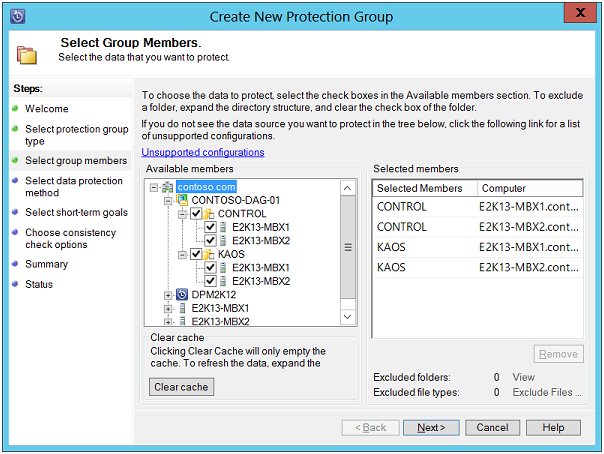
Select Group Members: On this page, provide details about the computers and Database Availability Groups that are to be protected. You can take help of "Available Members" box for this. Also, you can expand Server nodes in order to select data sources on every Server. Enable check boxes for including mailboxes.
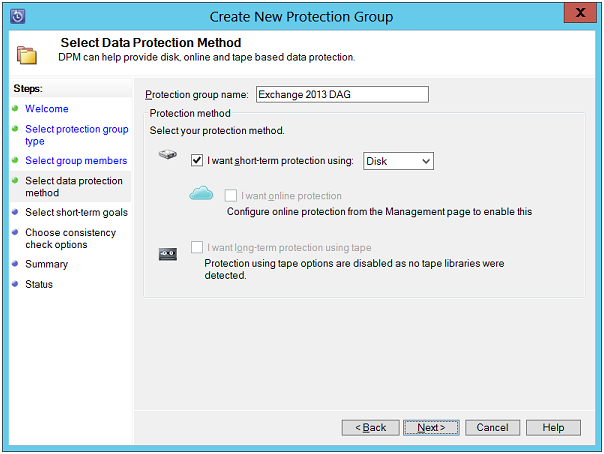
Select Data Protection Method: In this page, select "Short–Term Protection" option and to chose the media, use the drop-down list and select "Disk".
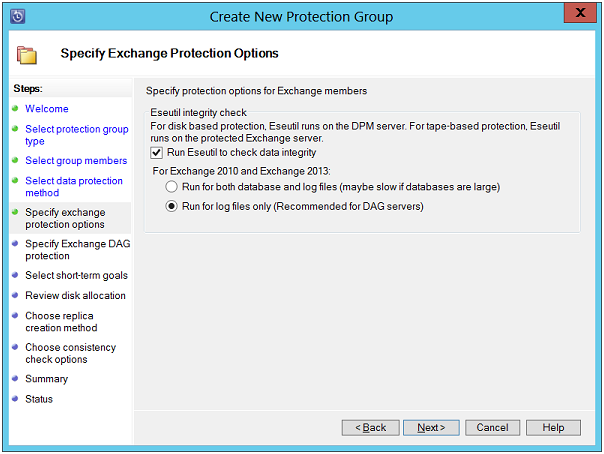
Specify Exchange Protection Options: On this page, enable check box for "Run ESEutil t check data integrity". To protect DAG files, enable check box for "Run for log files only".
Note: If step 1 in this process is not followed, you might see following error on screen:

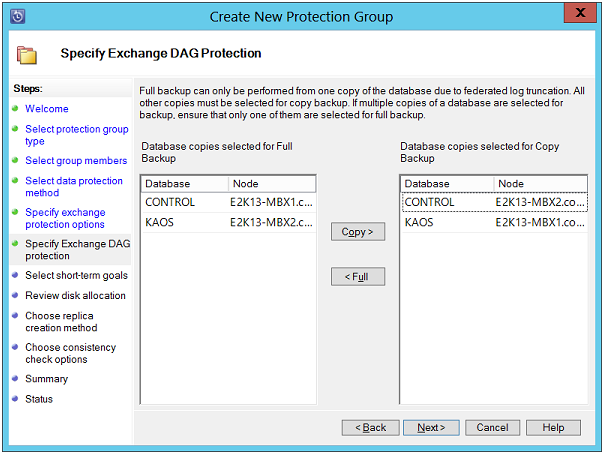
Specify Exchange DAG Protection: Select database for creating Copy or Full backup. For creating more than one copy of a database, it is recommended to select only one database for full and incremental backup.
Specify Short–Term Goals: On this page, define retention period for data recovery. For this, use the "Retention Range" box. For incremental backup, set a "Synchronization Frequency". For full backup, choose "Just Before a recovery point". To make changes in recovery point, click "Modify".

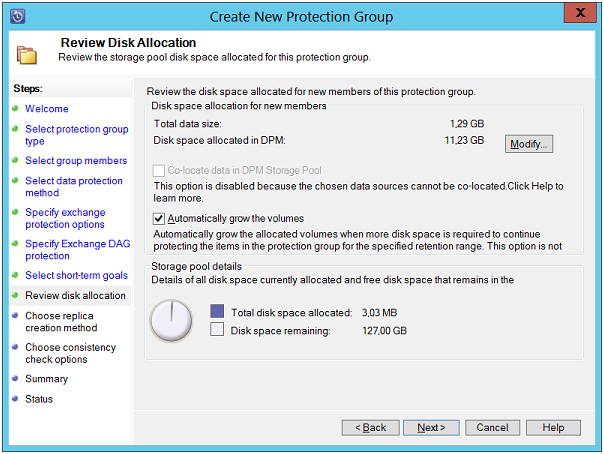
Review Disk Allocation: This page will help in allocating storage pool space for protecting specific data sources. It is recommended to keep the size of DPM replica volume a little larger than the space that every data source size is expected to be. Size of recovery point volume will examine number of recovery points that are defined earlier for disk based restore.
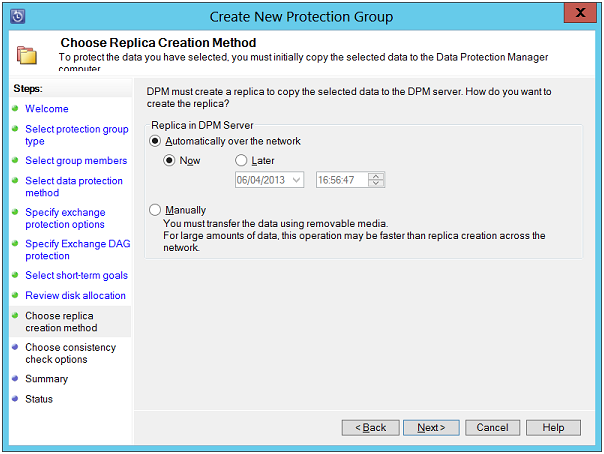
Choose Replica Creation Method: On this page, define a time when should the DPM start up the replication process and click on Next button to continue.
Automatically over Network: Here, Database Protection Manager will do replication across a network.
Now: To allow DPM to immediately start copying data from computers.
Later: This will allow scheduling the copying process when there is less traffic over network.
Manually: Use this when USB storage or a tape has to be used for transferring data to DPM Server.
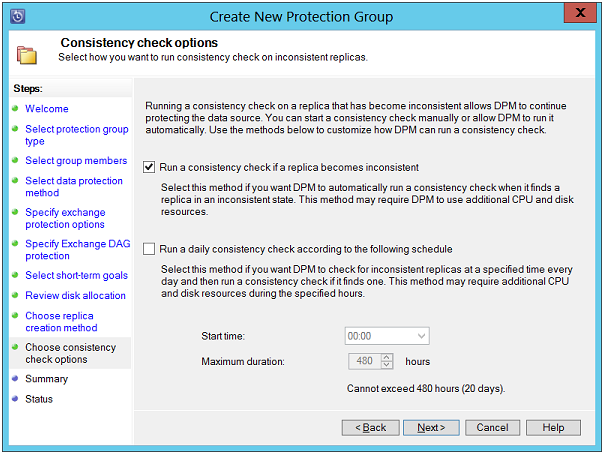
Choose Consistency Check Options: If any replica becomes inconsistent, a consistent check can be run against it or you can schedule consistency check on regular basis or as required.
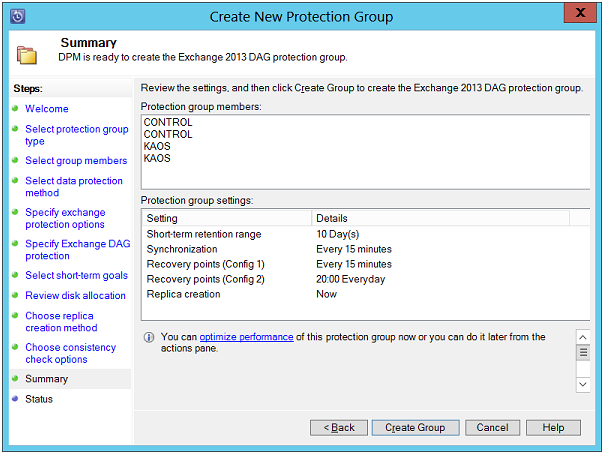
Summary: A view of all tasks set to create protection group will be available on this page. Click on "Create Group" button to start up the process.
Status: A status report of protection group creation will be displayed on this page.

Summary
In the blog, Data protection manager 2012 Exchange 2013 we leant about how Database Protection Manager 2012 emerged out to be e great help for users. Also, a discussion on how to allocate storage pool, install protection agents on computers with DPM is done that might help in getting started with the service.
In order to get more information about introduction of Data Protection Manager 2012, Visit: https://www.edb.2pst.net/blog/data-protection-manager-2012-exchange-2013.html